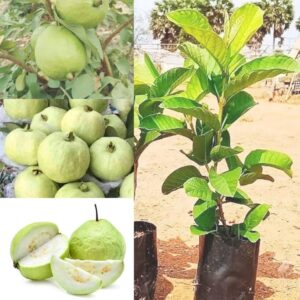
Guava is one of the most profitable fruit crops grown in tropical and subtropical regions. Farmers and home gardeners prefer grafted guava plants because they produce fruits earlier, maintain desirable traits, and ensure uniform quality. Among different propagation methods, the guava side grafting technique has gained popularity due to its high success rate and strong plant establishment.
This practical guide explains the process, benefits, and essential care tips for successful grafting.
What Is Side Grafting in Guava?
Side grafting is a vegetative propagation method where a scion (desired variety) is attached to the side of a healthy rootstock. The scion gradually joins with the rootstock tissue and grows as a single plant. This method is widely used in nurseries because it allows better control over plant quality and improves survival rates compared to seed-grown plants.
The guava side grafting technique is especially useful for multiplying superior varieties that have better fruit size, taste, and disease resistance.
Advantages of Side Grafting in Guava
-
Faster fruiting compared to seed-grown plants
-
Uniform fruit quality and size
-
Higher yield potential
-
Improved resistance to soil and climatic stress
-
Strong plant growth and early establishment
Farmers who adopt the guava side grafting technique often experience more consistent orchard performance and reduced variability among plants.
Step-by-Step Guava Side Grafting Process
1. Selection of Rootstock
Choose a healthy, disease-free rootstock about 8–12 months old with a stem thickness similar to the scion.
2. Selection of Scion
The scion should come from a high-yielding and healthy mother plant. Select mature but not overly woody shoots.
3. Making the Cut
Make a slanting cut of about 3–4 cm on the side of the rootstock. Prepare a matching cut on the scion so both surfaces fit closely.
4. Joining the Scion and Rootstock
Insert the scion into the cut and ensure proper cambium contact. This is crucial for successful union formation.
5. Wrapping the Graft
Tie the joint firmly using grafting tape or polythene to prevent moisture loss and infection.
6. Aftercare
Keep the grafted plants in partial shade and maintain moderate humidity. Remove shoots emerging from the rootstock below the graft union.
Common Mistakes to Avoid
-
Using immature or diseased scion wood
-
Poor alignment of cambium layers
-
Loose tying leading to moisture loss
-
Grafting during extreme weather conditions
-
Overwatering immediately after grafting
Avoiding these mistakes significantly increases graft success.
Best Season for Guava Side Grafting
The ideal time for grafting is during active growth periods when sap flow is good, usually in late winter to early spring or during mild monsoon conditions, depending on regional climate.
Final Thoughts
The guava side grafting technique is a reliable and efficient propagation method for farmers and nursery growers aiming for higher productivity and better fruit quality. With proper selection of plant material and careful aftercare, growers can achieve strong plant development and early fruiting, making guava cultivation more profitable and sustainable.