Every plant enthusiast knows that propagation is one of the most rewarding parts of gardening — watching new roots form and seedlings thrive is a joy. But if your cuttings keep rotting or your plants show signs of infection, the culprit might be your tools.
Keeping propagation tools clean and sterile is essential for preventing disease and ensuring successful plant growth. While commercial sterilizers exist, there’s one simple, natural, and inexpensive option you probably already have at home: vinegar for sterilization.
Using vinegar properly can dramatically reduce contamination and help your propagation efforts succeed like never before. To dive deeper into why this method works and how to apply it step by step, check out this detailed Vinegar Sterilization Guide.
Why Clean Tools Matter
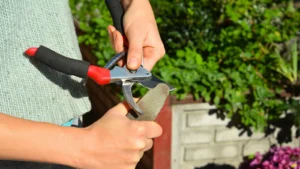
When you use propagation tools — like scissors, shears, or scalpels — any residue left behind from previous uses can introduce harmful bacteria or fungi to fresh plant tissue. This can lead to:
-
Failed cuttings
-
Mold growth
-
Stem rot
-
Slow rooting
Even trace amounts of pathogens can spell disaster for delicate cuttings. Sterilizing your tools helps ensure every new cutting gets the healthiest possible start.
How Vinegar Works
Vinegar, specifically white distilled vinegar, contains acetic acid — a natural compound with antimicrobial properties. When used correctly, it can neutralize many harmful microorganisms that linger on tools.
Compared to harsh chemicals or commercial bleach solutions, vinegar is:
-
Safer to handle
-
Environmentally friendly
-
Cost‑effective
-
Easy to rinse off
To learn the correct concentrations and techniques that experienced growers use, don’t miss this complete Vinegar Sterilization Guide.
Step‑by‑Step Sterilization Process
Here’s a simple routine you can adopt:
-
Clean off debris first — Remove soil and sap with warm, soapy water.
-
Soak in vinegar solution — Use full‑strength vinegar or mix with water in a spray bottle.
-
Let tools sit for several minutes — Give the acetic acid time to work.
-
Rinse and dry thoroughly — Prevent corrosion and prepare tools for immediate use.
This process only takes minutes, but it protects your plants from days or weeks of potential setbacks.
When to Sterilize
Make it a habit to sterilize your tools:
-
Between plant species — Different plants can carry unique pathogens.
-
Between individual cuttings — Especially if a plant looked unhealthy.
-
After any infection appears on previous propagations.
Regular sterilization becomes second nature once you see how much healthier and more productive your propagation batches become.
Extra Tips for Healthy Propagation
-
Always use sharp, clean tools
-
Work in a clean area with good airflow
-
Label cuttings to monitor success rates
-
Use fresh media free from contaminants
These practices, combined with vinegar‑based tool sterilization, give your plants their best chance to thrive.
Sterilizing propagation tools doesn’t have to be complicated. With a little vinegar and a simple routine, you can protect your precious cuttings and help them grow into strong, vigorous plants. For the full explanation of why this method works so well — and how to implement it correctly — explore this comprehensive Vinegar Sterilization Guide.